Sign in with PingIdentity
To enable Sign in with PingIdentity, you need to create an Application in your PingIdentity account. The following steps guide you through the process:
-
Go to the PingIdentity Admin Console and select the appropriate environment.
-
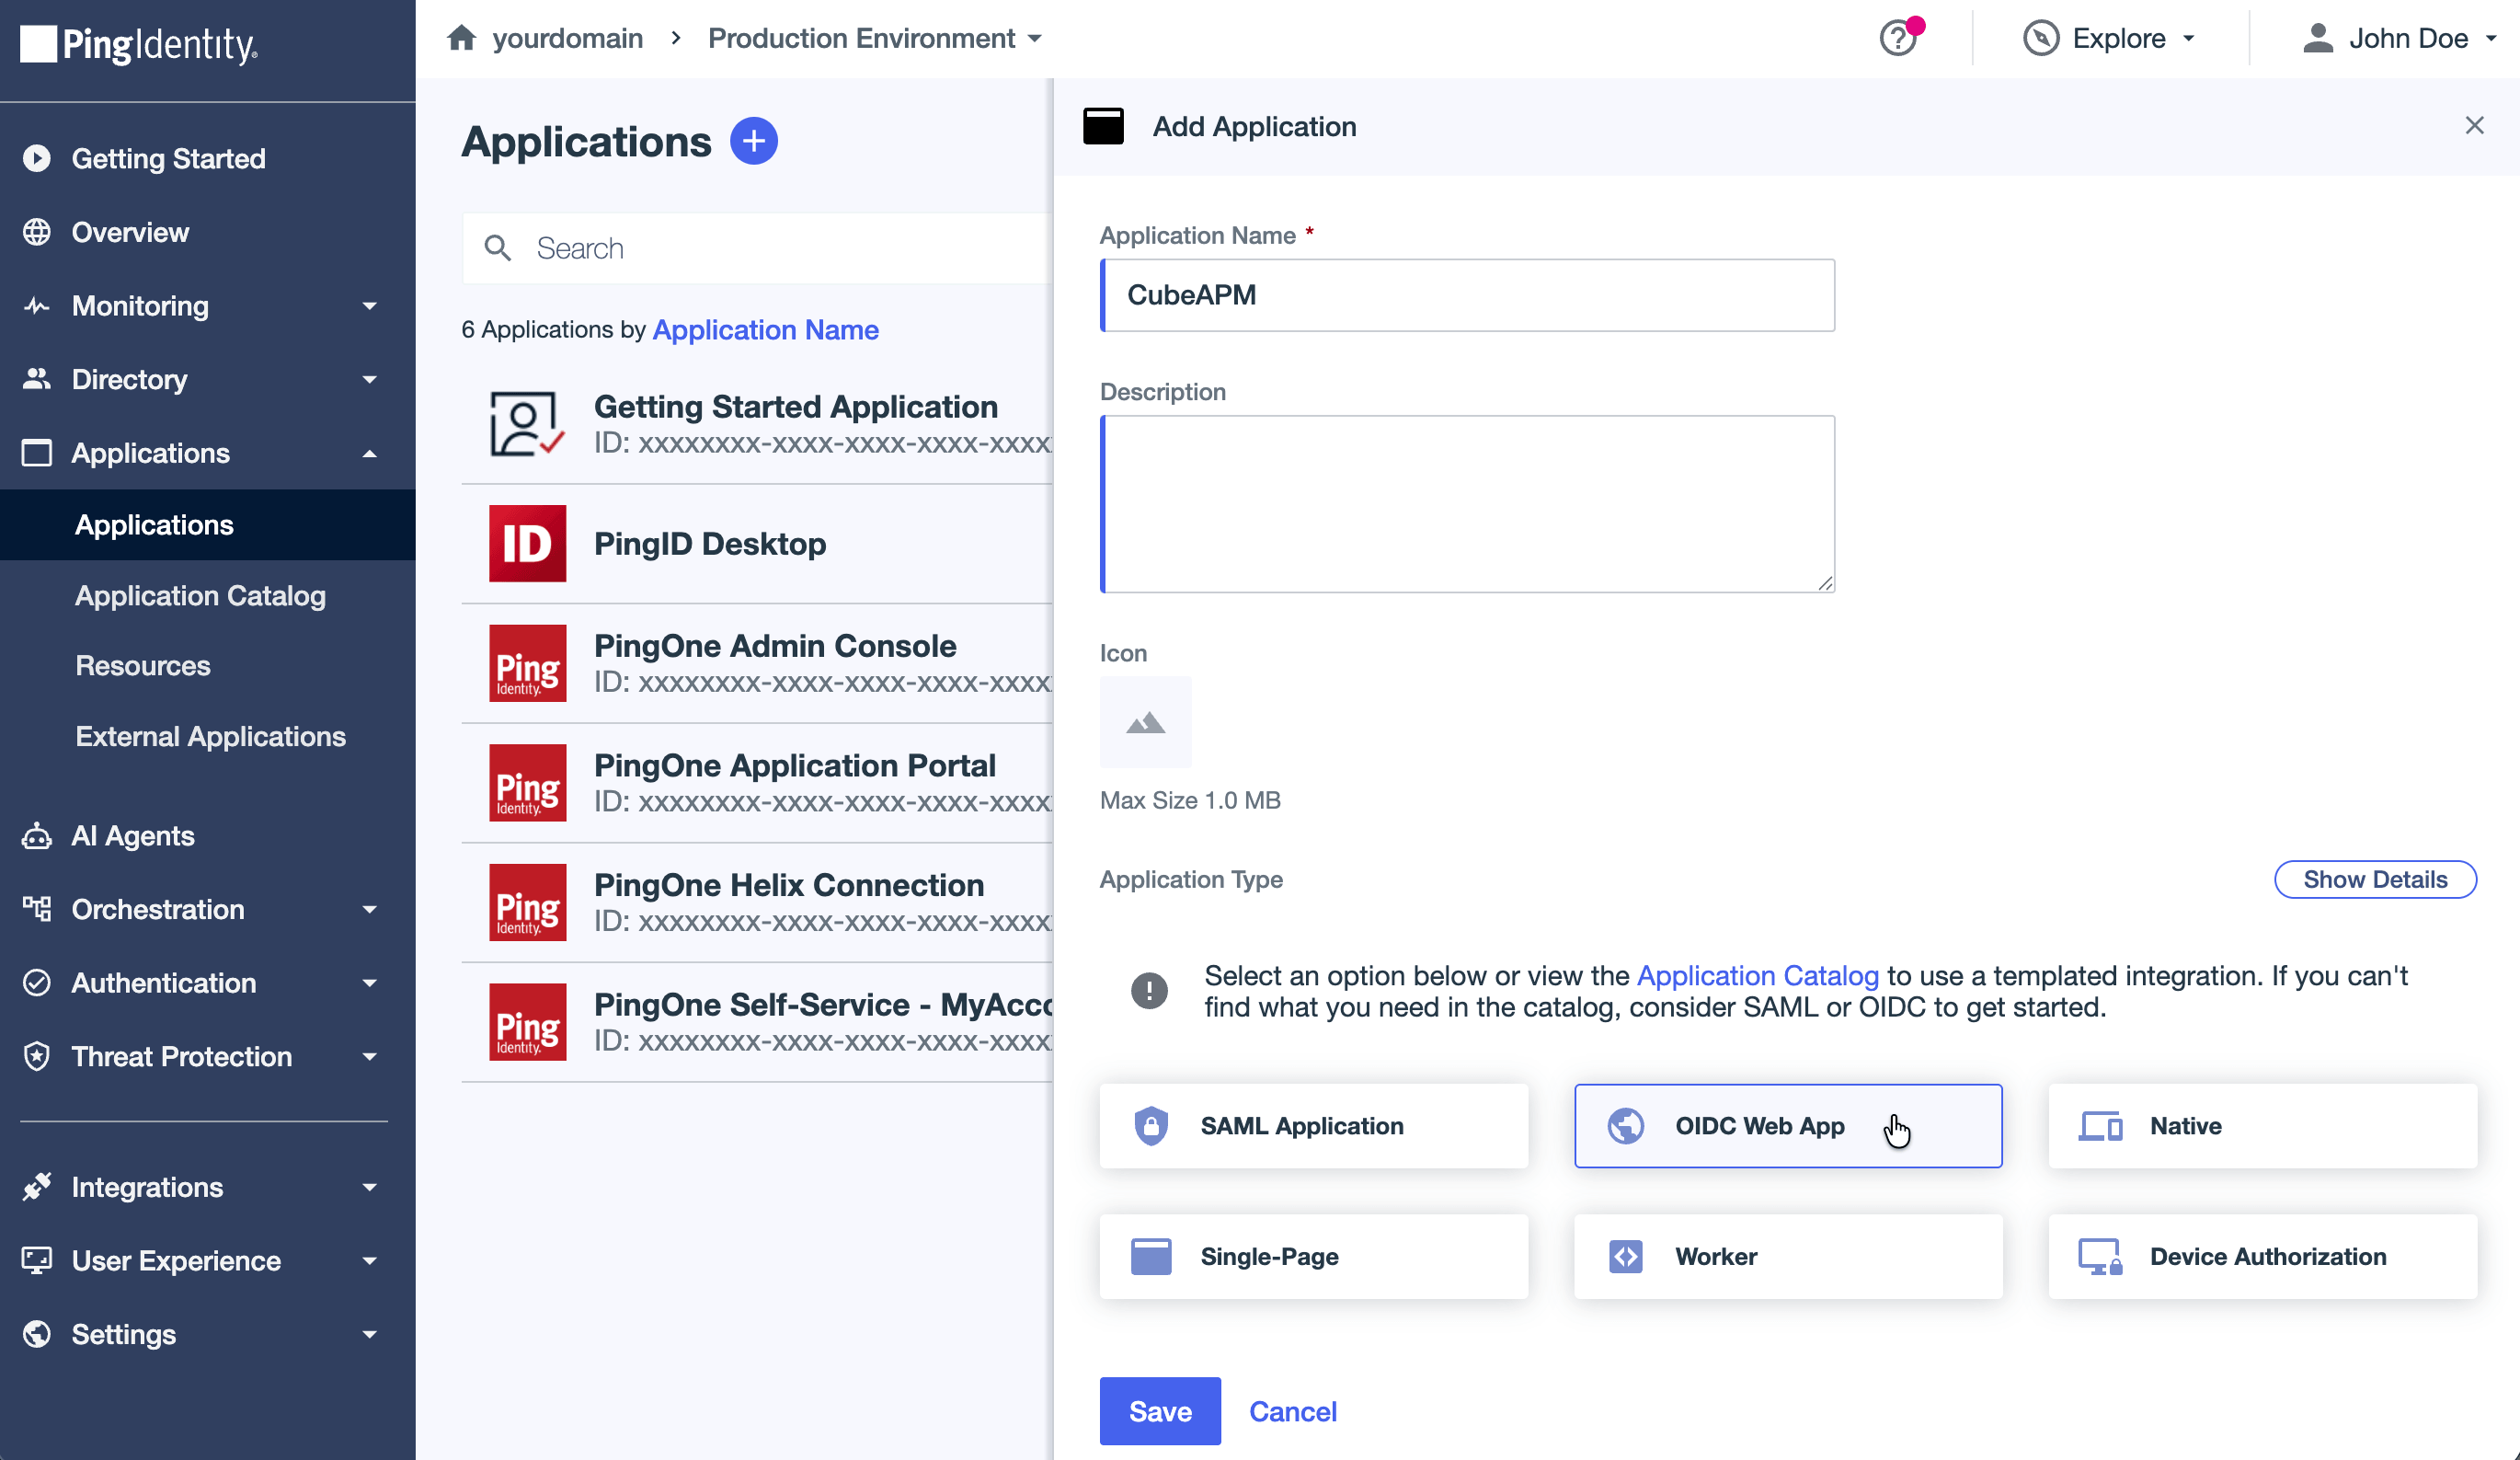
Navigate to Applications > Add Application. Fill CubeAPM in Application Name, select OIDC Web App in Application Type, and click Save.
-
On the Application Overview page that appears next, click the switch next to the application name to enable the application.
Then, on the same page, copy Client ID, Client Secret, and Issuer ID and provide them to CubeAPM to enable Sign in with PingIdentity (set
auth.oidc.pingidentity.client-id,auth.oidc.pingidentity.client-secretandauth.oidc.pingidentity.issuer-urlproperties in/etc/cubeapm/config.properties, orconfigVars.auth.oidc.pingidentity.clientId,configVars.auth.oidc.pingidentity.clientSecretandconfigVars.auth.oidc.pingidentity.issuerUrlin helm chart values file).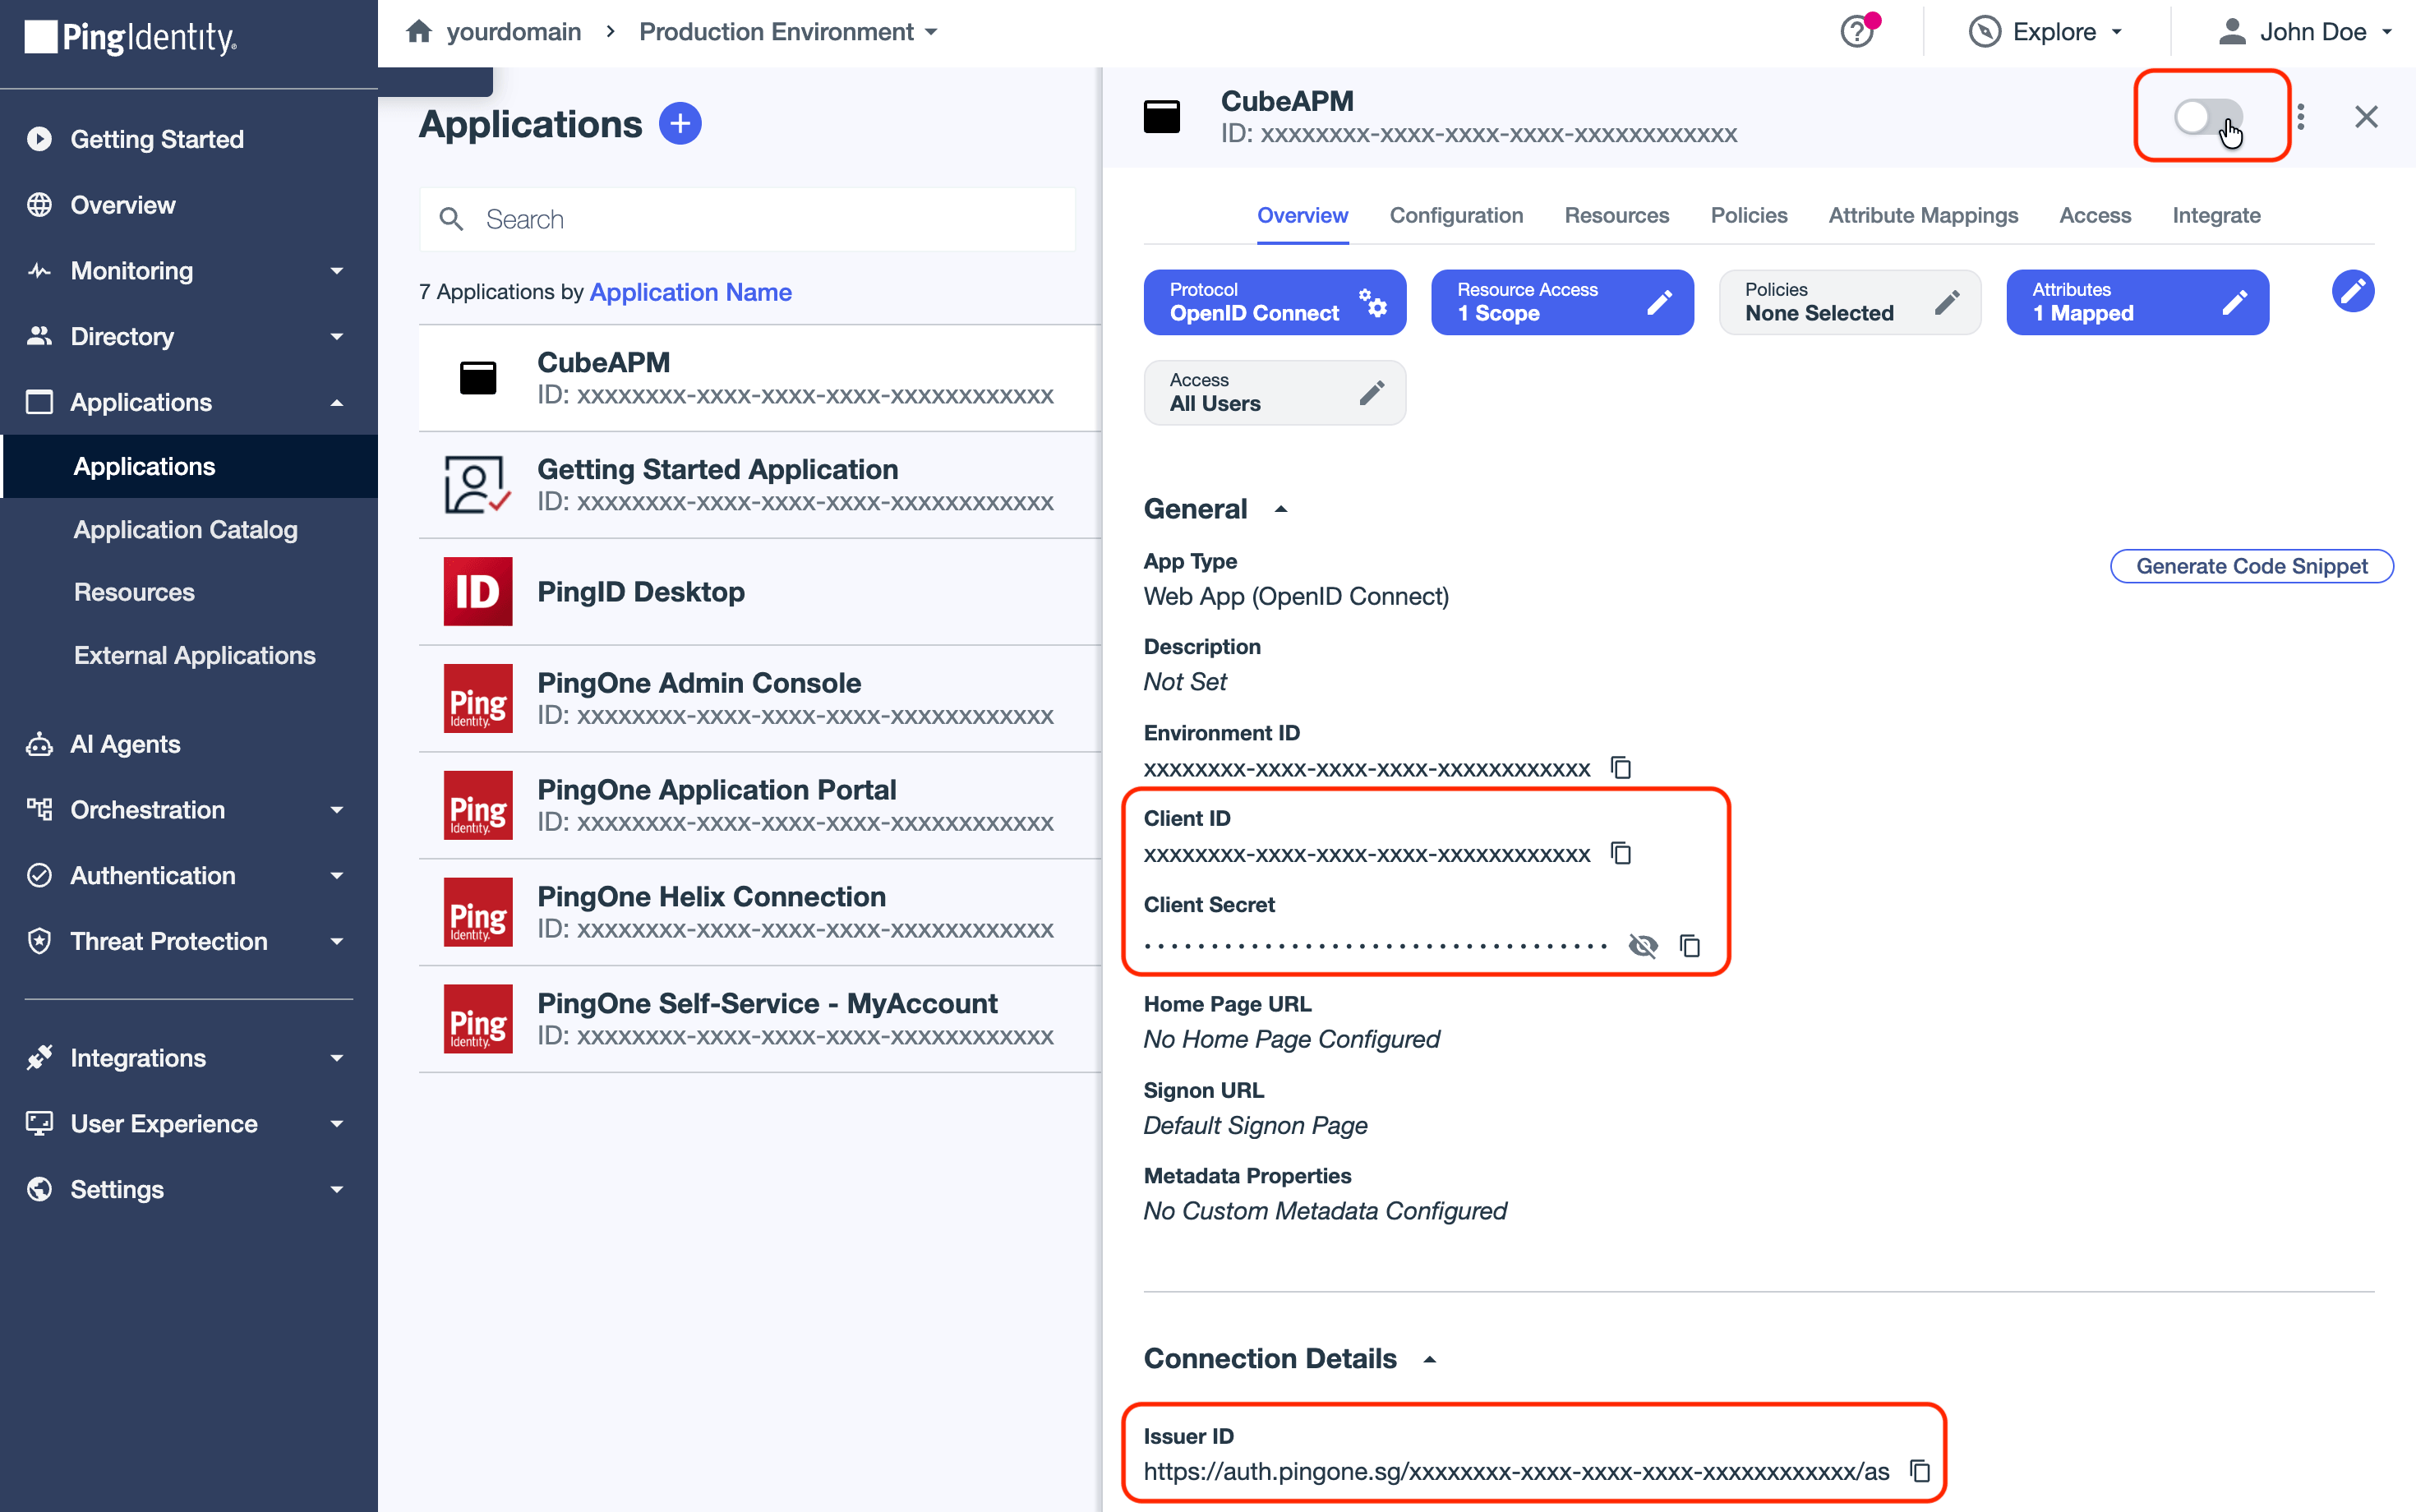
-
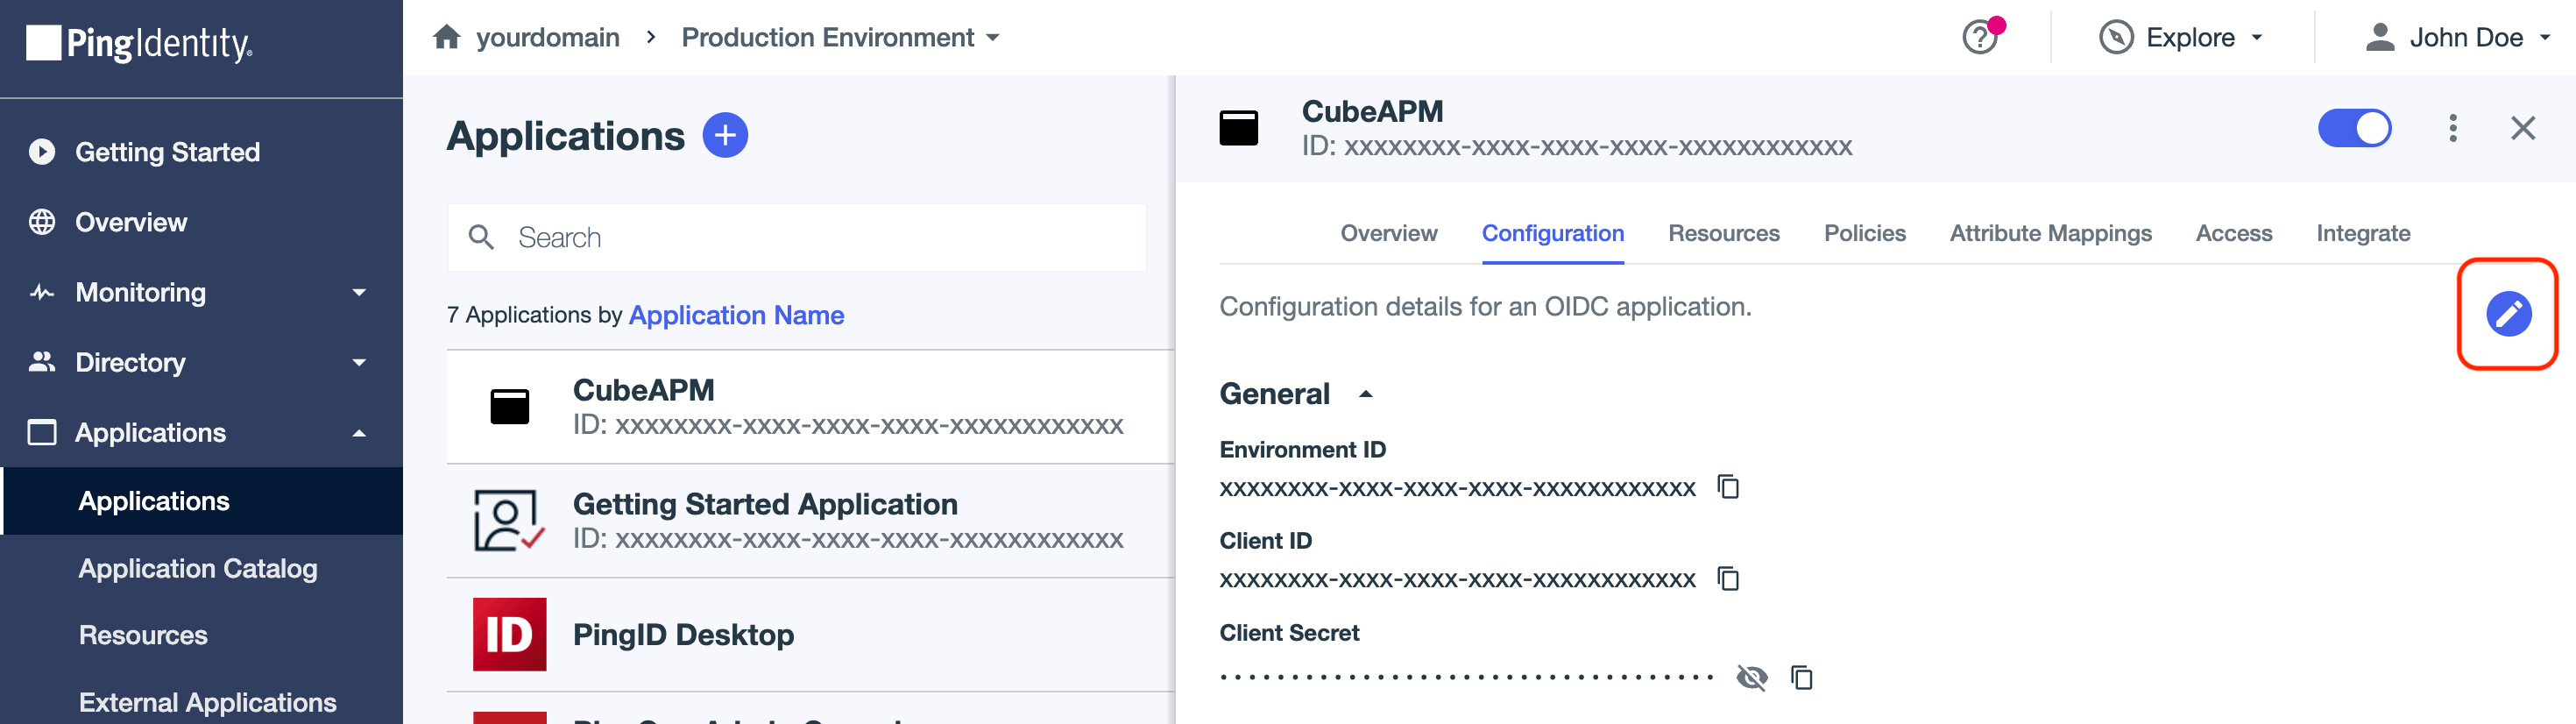
Go to Configuration tab and click on Edit button.
On the Edit screen, fill
<cubeapm_address>/api/auth/self-service/methods/oidc/callback/pingidentityin Redirect URIs and click Save.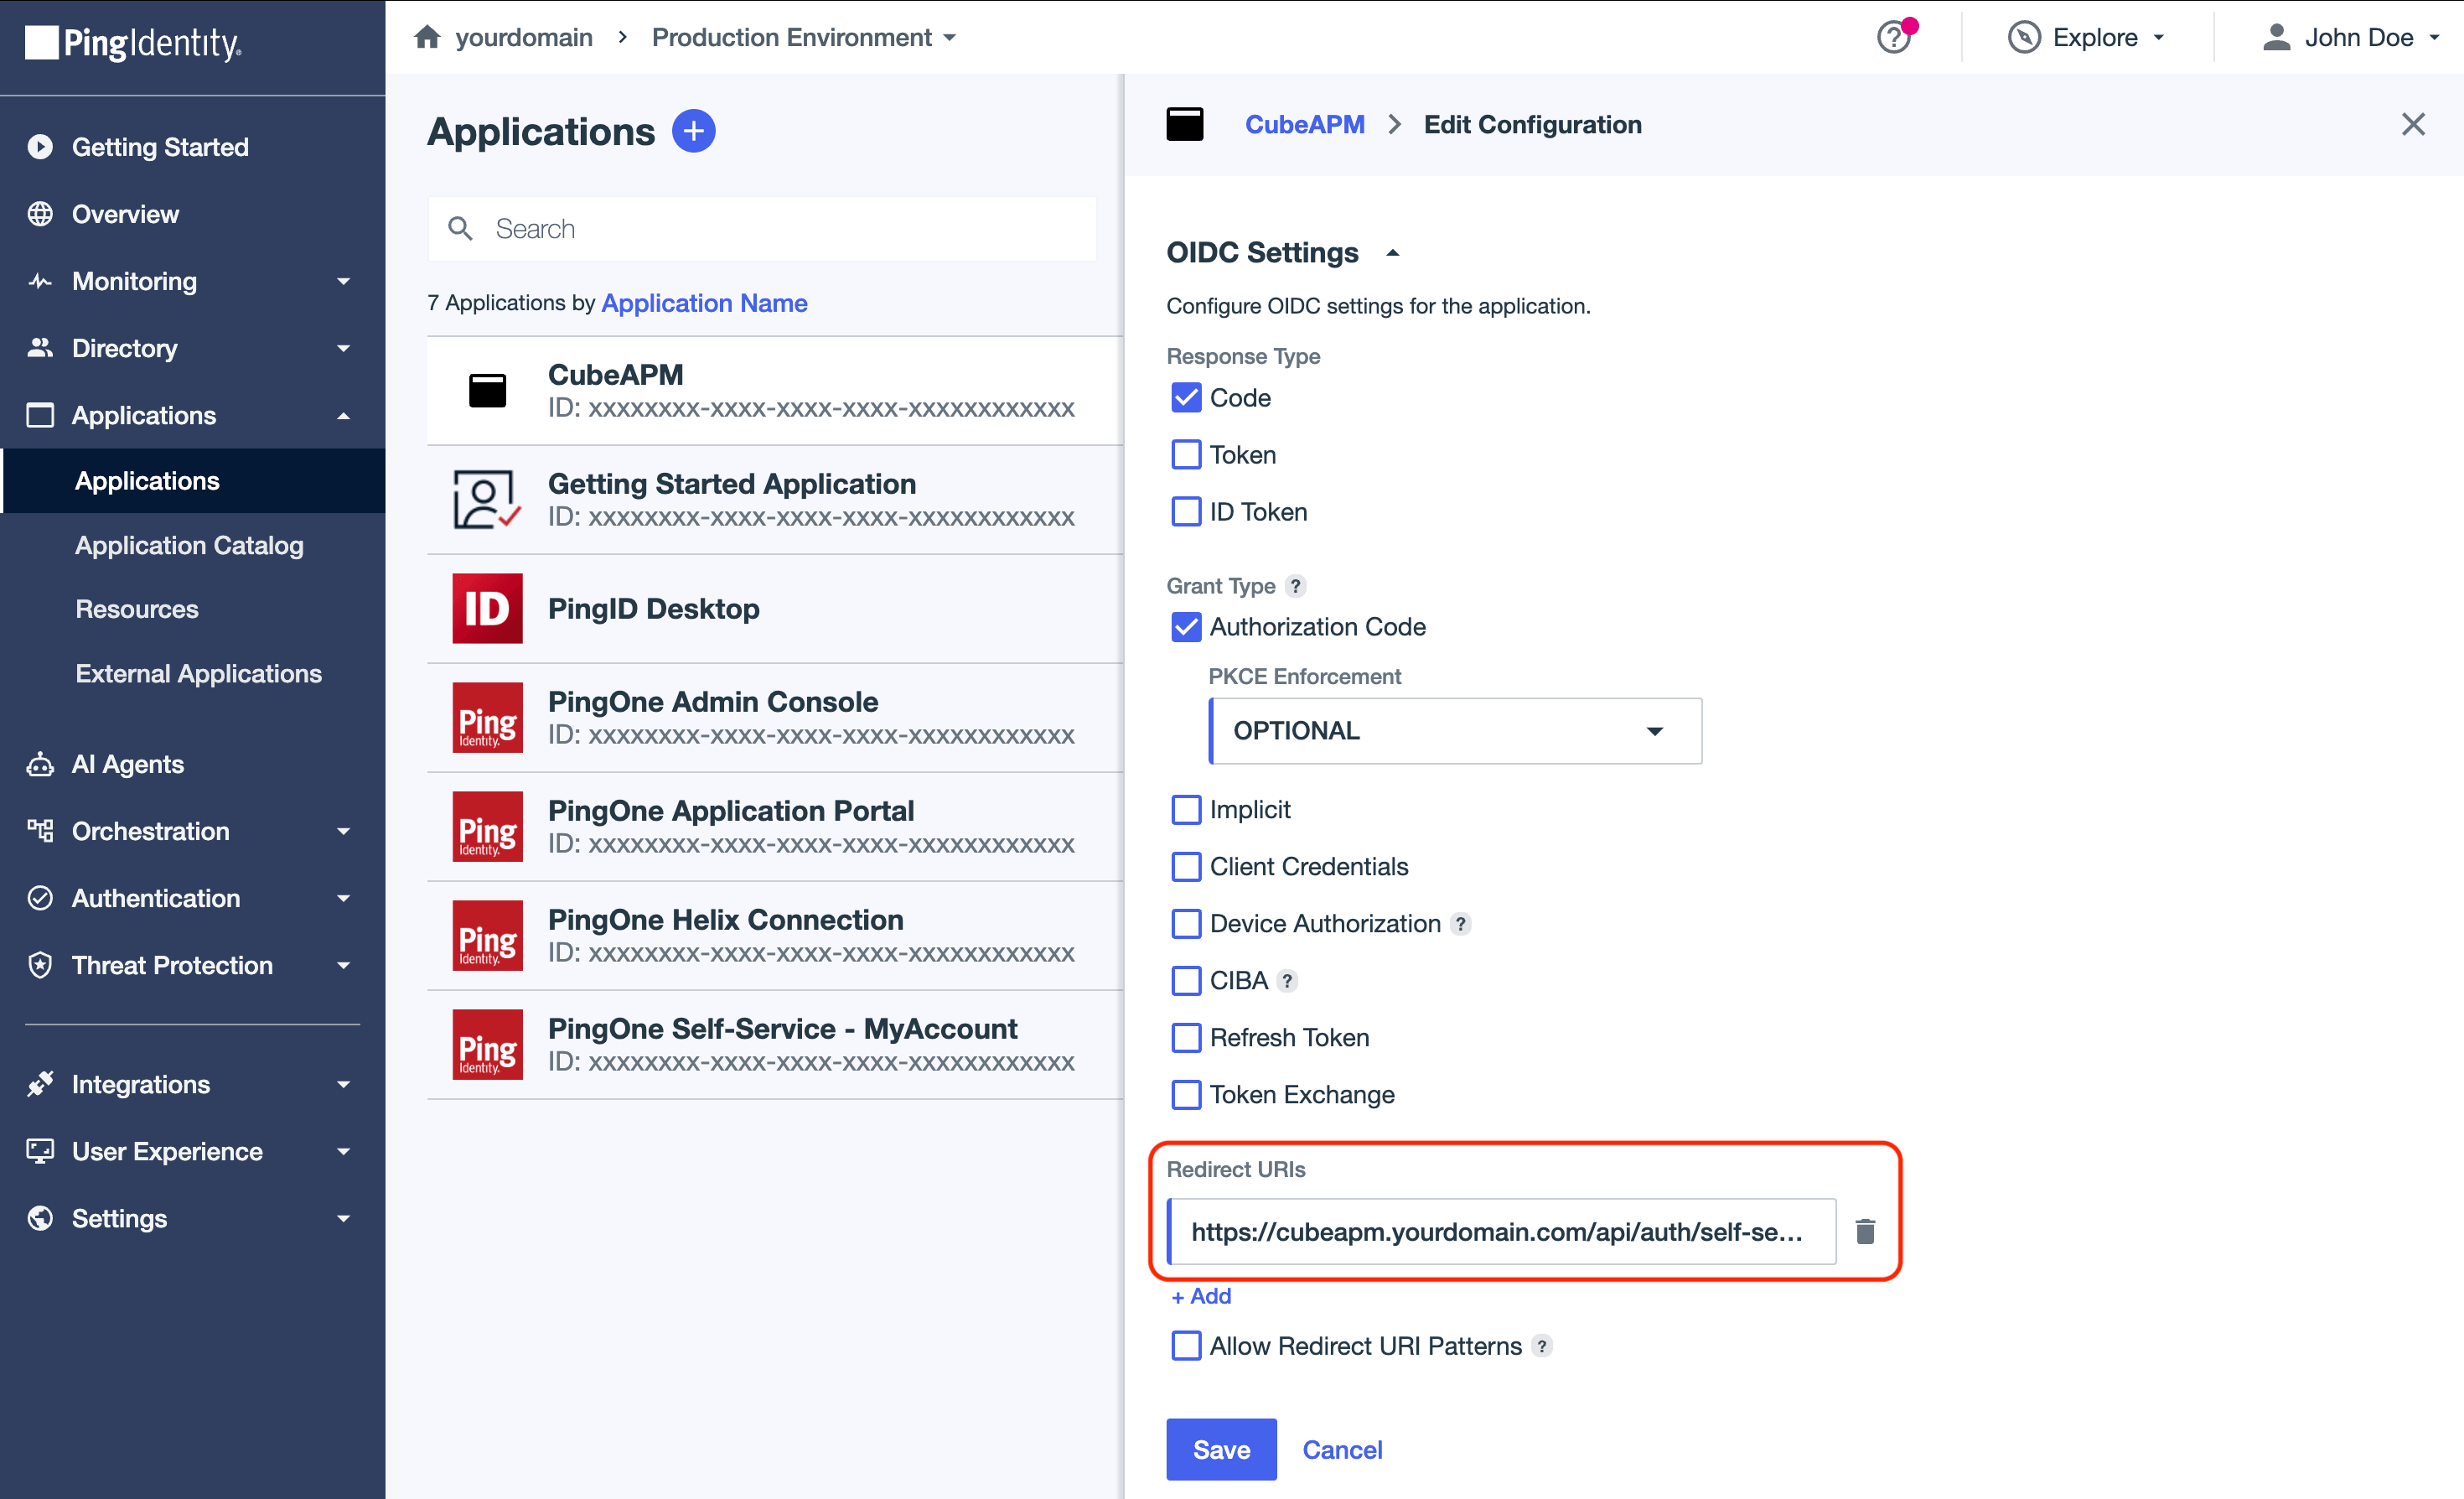
-
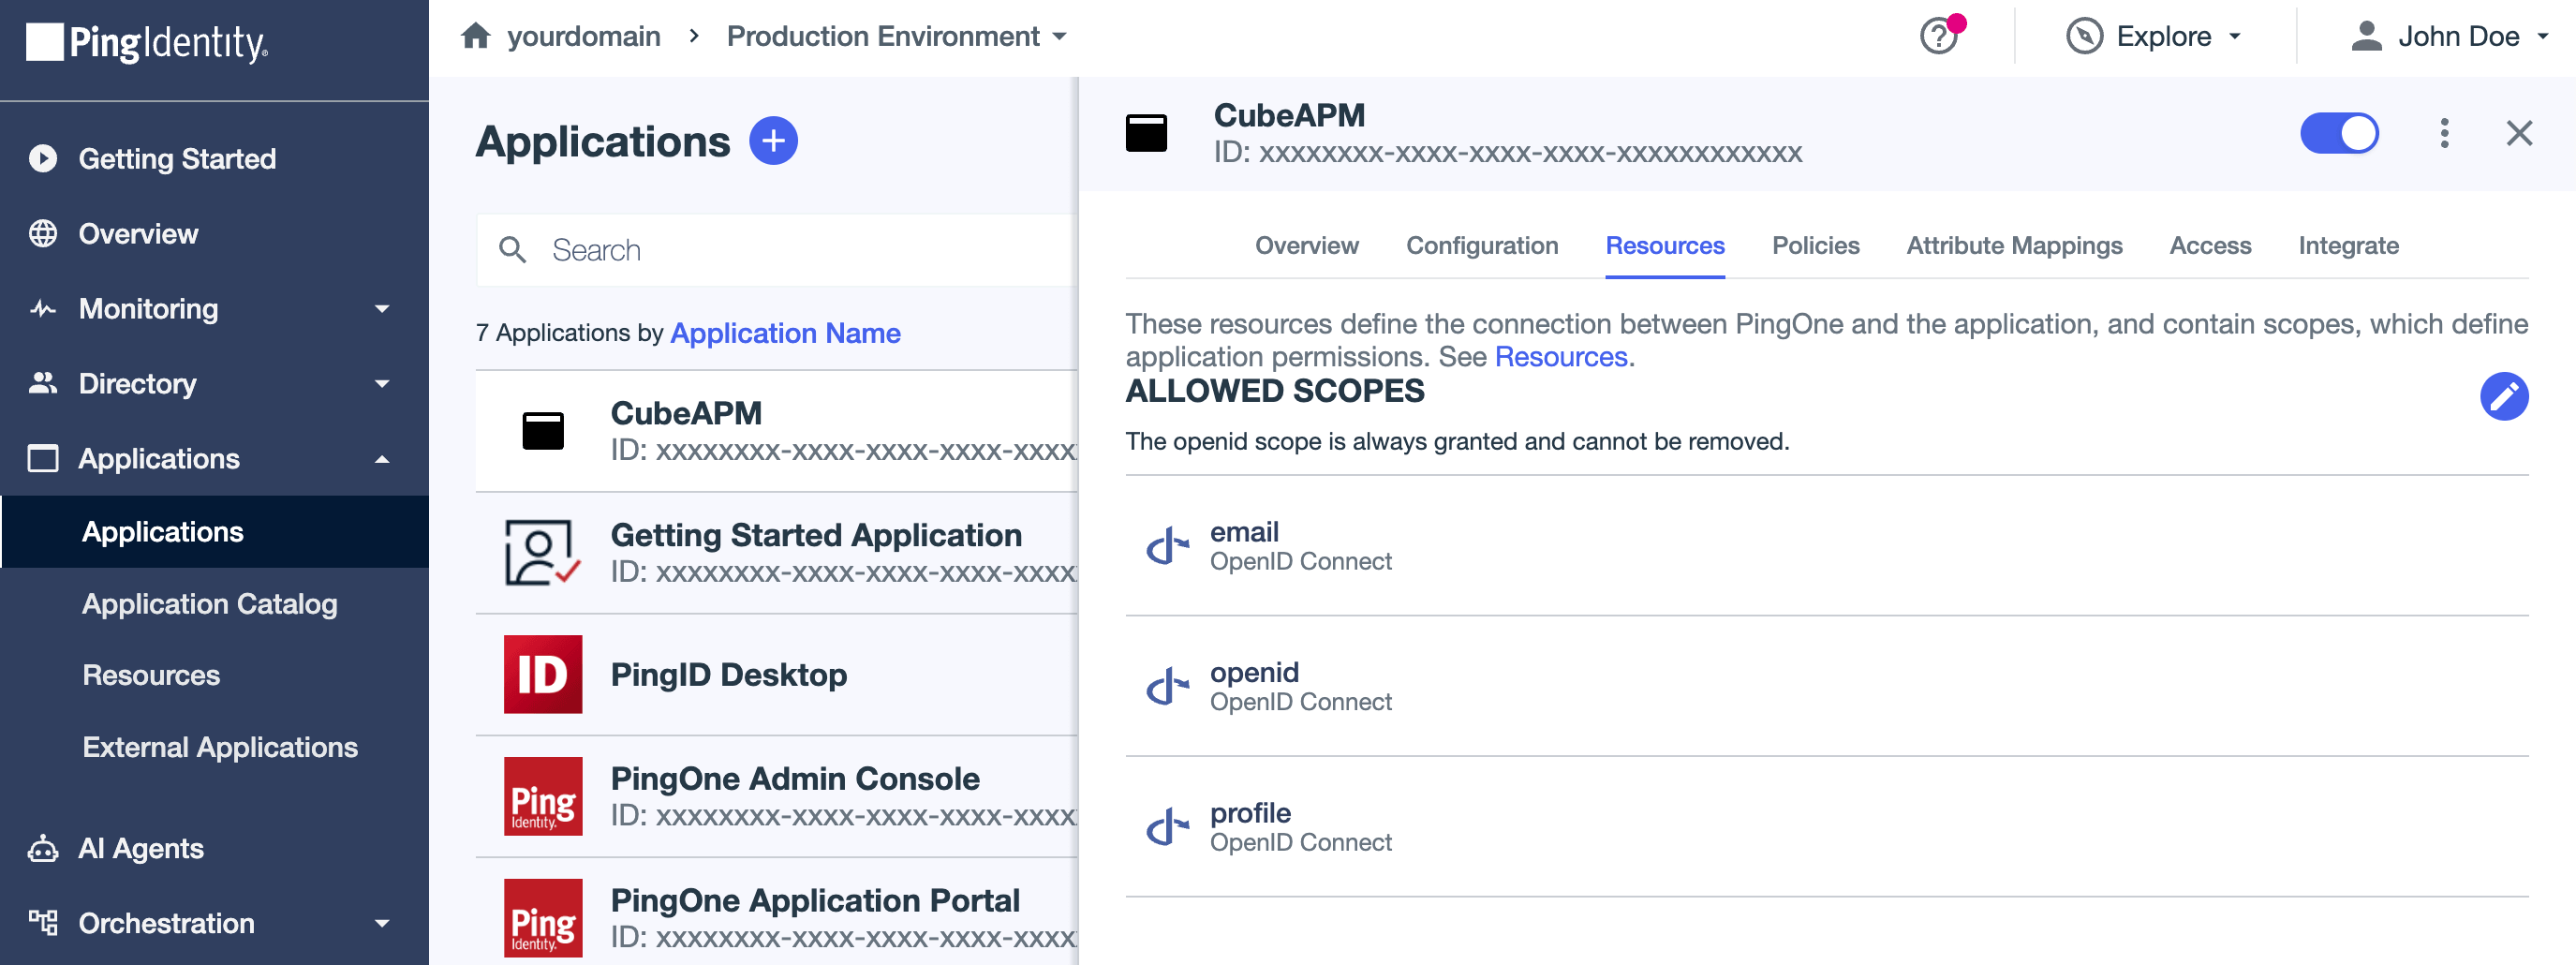
Go to Resources tab, click Edit, and add email, openid and profile scopes. You may need to scroll down the list to find the scopes.
-
Go to Policies tab, click Edit, and select the desired policies.
The PingIdentity application is now ready for use with CubeAPM.